
Introduction
In this tutorial we will check how to get temperature and humidity measurements from a DHT22 sensor, with the Arduino IDE running on the ESP8266.
We will use this library to interact with the sensor. This library exposes very simple and easy to use functions, which abstract from us the lower level details of the single wire communication protocol needed to interact with the DHT22.
As shown in figure 1, this library can be installed via the Arduino IDE Library Manager.
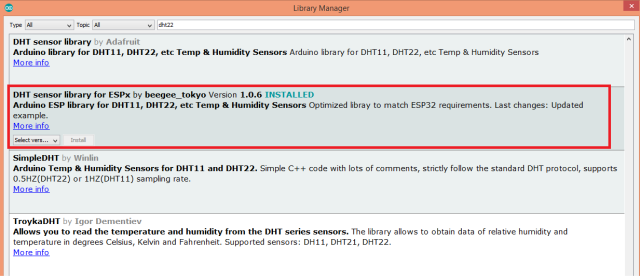
Figure 1 – Installing the DHT22 library from the Arduino IDE Library Manager.
To make it easier to interact with the sensor from the ESP8266, I’m using a DFRobot DHT22 module. This module already contains all the additional electronics needed and exposes a wiring terminal that facilitates the connections.
The tests were performed using a DFRobot’s ESP8266 development board. If you are interested on interacting with the DHT22 sensor from a ESP32 board, then please check the links available in the “Related Posts” section at the end of this tutorial.
The electric diagram
The electric diagram needed for the whole system is very simple, as illustrated in figure 2. The DHT22 has a single wire interface, meaning we can get the measurements from it simply using a digital pin from a microcontroller.

Figure 2 – Wiring diagram between the DHT22 and the ESP8266.
In the previous figure, the pin that is used to get the data from the DHT22 is generically labeled as “Data”. Depending on your module, it may be labeled differently or it may even not be labeled.
For instance, the module I’m using is not labeled and we should perform the connections accordingly to the color of the wires that are connected to it:
- Black: GND
- Red: VCC
- Green: Data
Make sure to double check your connections before powering the circuit, accordingly to your device’s datasheet.
Regarding the power supply, you may either power the DHT22 using a power pin from your ESP8266 board, if it has such pin, or using an external power supply such as this. If you use an external power supply, then don’t forget to have a common ground between all the devices of the circuit.
The code
We will start by including the previously installed library, which will allows us to interact with the sensor.
#include "DHTesp.h"
Then we need to declare an object of class DHTest, which will allow us to obtain both the temperature and humidity from the sensor using a higher level interface that will abstract the details of the lower level communication protocol used to get the measurements from the sensor.
DHTesp dht;
Moving on to the Arduino setup function, we will first open a serial connection, in order to later output the values of the measurements.
Serial.begin(115200);
Then, we need to call the setup method on our DHTesp object. This method is used to initialize the sensor interface and it receives as input the number of the pin of the ESP8266 that is connected to the DHT22. I will be using pin 14, but you can try with other digital pins.
void setup()
{
  Serial.begin(115200);

  dht.setup(14);
}
We will get the temperature and humidity measurements periodically on the Arduino main loop function.
To obtain the measurements, we simply need to call the getTempAndHumidity method on the DHTesp object. This method takes no arguments and returns as output a struct of type TempAndHumidity, which will contain both measurements.
Note that if you want to get each type of measurement individually, this class also has the methods getTemperature and getHumidity, which return the temperature and humidity as floats, respectively.
TempAndHumidity measurement = dht.getTempAndHumidity();
On the TempAndHumidity struct, we can obtain the temperature measured from the temperature data member, and the humidity from the humidity data member. The temperature is returned in degree Centigrade and the humidity in percentage.
We will print both values to the serial port, so we can check them on the Arduino IDE serial monitor
Serial.print("Temperature: ");
Serial.println(measurement.temperature);

Serial.print("Humidity: ");
Serial.println(measurement.humidity);
Finally, we will introduce a small 5 seconds delay so we wait a bit between measurements. Note that you should not go lower than the minimum sampling period of 2 seconds between consecutive measurements, which should be an acceptable value for many applications since both ambient temperature and humidity usually don’t have sudden changes.
The final source code can be seen below.
#include "DHTesp.h"

DHTesp dht;

void setup()
{
  Serial.begin(115200);

  dht.setup(14);
}

void loop()
{
  TempAndHumidity measurement = dht.getTempAndHumidity();

  Serial.print("Temperature: ");
  Serial.println(measurement.temperature);

  Serial.print("Humidity: ");
  Serial.println(measurement.humidity);

  delay(5000);
}
Testing the code
After performing all the electric connections, simply compile and upload the code to your ESP8266 using the Arduino IDE.
Once the procedure finishes, open the Serial Monitor of the IDE. You should get an output similar to figure 3, which shows both the temperature and humidity measurements getting printed.

What happens if one wants two temperature+humidity sensors (say, two distinct rooms; inside versus outside)
Can one use something like that:
DHTesp dhtInside;
DHTesp dhtOutside;
const int insidePin = 14;
const int outsidePin=15;
in setup
dhtInside.setup(insidePin);
dhtOutside.setup(outsidePin);
?